✓ Sourdough starter is a living culture of wild yeast and bacteria.
✓ It requires only flour and water to create.
✓ The process typically takes 5-7 days to establish an active starter.
✓ Regular feeding is essential for its health and activity.
How It Works
1
Combine Flour & Water
Mix equal parts flour and water to begin cultivating wild yeasts present in the environment. This initial mixture forms the foundation of your starter.
2
Daily Feeding Routine
Discard a portion of the starter and feed it fresh flour and water daily. This process removes metabolic waste and provides new nutrients for growth.
3
Observe Activity
Watch for signs of life: bubbles, a pleasant sour smell, and a noticeable rise and fall. These indicators confirm your starter is becoming active and strong.
4
Achieve Maturation
Continue feeding until your starter consistently doubles in size within 4-8 hours after feeding. This indicates it's ready to bake delicious sourdough bread.
Understanding the Magic Behind Your Sourdough Starter
Photo: Guillermo Berlin / Pexels
Embarking on the journey of how to make sourdough bread starter is more than just mixing flour and water; it's about cultivating a living ecosystem. At its heart, a sourdough starter is a symbiotic culture of wild yeasts and lactic acid bacteria (LAB) that are naturally present in flour and the air around us. These microscopic organisms work together to ferment sugars in the flour, producing carbon dioxide (which makes your bread rise) and a variety of organic acids (which give sourdough its distinctive tangy flavor and improve its keeping qualities). Unlike commercial yeast, which is a single, isolated strain, a sourdough starter boasts a diverse microbial community, making each starter unique and imparting complex flavors to your bread. Think of it as your own personal microbial pet, requiring care, observation, and consistency. The beauty of this process lies in its simplicity – just two ingredients, flour and water – yet the results are profoundly complex and rewarding.
The initial stages of creating a starter involve providing a hospitable environment for these wild yeasts and bacteria to thrive. When you first combine flour and water, you're essentially offering a buffet for these microorganisms. The flour provides carbohydrates for energy, and the water hydrates them, allowing metabolic processes to occur. Over the first few days, you might notice some activity, perhaps a few small bubbles or a slightly yeasty smell. This is the beginning of the microbial colonization. However, not all activity is good activity. Sometimes, undesirable bacteria can flourish initially, which is why your starter might smell unpleasant (like gym socks or nail polish remover) in the early stages. Patience is crucial here; consistent feeding helps to outcompete these unwanted microbes and encourages the beneficial ones to dominate.
One of the most fascinating aspects of a sourdough starter is its resilience. It can be neglected, put in the fridge for weeks, or even dried out, and with proper care, it can be revived. This robustness is a testament to the hardiness of the wild yeast and bacteria. Furthermore, the type of flour you choose can significantly influence the character of your starter. Whole wheat flour, for instance, contains more nutrients and a higher concentration of wild yeasts on its bran, often leading to a more vigorous and faster-developing starter. Rye flour is another excellent choice for similar reasons. While all-purpose flour can work, it might take a bit longer to get going. The water quality also plays a role; chlorinated water can inhibit microbial growth, so it’s often recommended to use filtered or unchlorinated tap water. Understanding these foundational elements demystifies the process and equips you with the knowledge to troubleshoot common issues as you learn how to bake with sourdough. The journey from flour and water to a bubbling, active starter is a testament to nature's incredible power and your patience.
Gathering Your Essential Tools and Ingredients for Success
Photo: Travel with Lenses / Pexels
Before you dive into the hands-on process of how to make sourdough bread starter, ensuring you have the right tools and ingredients will set you up for success and make the entire experience smoother. Thankfully, you don't need a lot of specialized equipment; most items are likely already in your kitchen.
First and foremost, you'll need a suitable container for your starter. A glass jar, like a canning jar or a wide-mouth Mason jar, is ideal. Glass allows you to easily observe the activity within your starter – those crucial bubbles and the rise and fall that indicate fermentation. Choose a jar with a capacity of at least 1-quart (around 1 liter) to accommodate its growth, especially during active feeding periods. It’s important not to seal the jar airtight; the starter needs to breathe. A loose-fitting lid, a piece of plastic wrap, or a clean kitchen towel secured with a rubber band will suffice. This allows gases to escape while preventing contaminants from entering.
Next, precise measurement is key, especially in the early stages. A digital kitchen scale is highly recommended for weighing flour and water. While measuring cups can work, weighing ensures accuracy, which is paramount for consistent results. Yeasts and bacteria thrive on specific ratios, and slight deviations can impact the starter's development. You'll also need a non-reactive stirring utensil, such as a rubber spatula or a wooden spoon. Avoid metal spoons, especially aluminum, as they can sometimes react with the acidic environment of the starter.
Now, for the stars of the show: flour and water. For your initial starter, a good quality unbleached all-purpose flour or, even better, whole wheat or rye flour, is recommended. Whole grain flours contain more nutrients and a richer microbial population, which often gives your starter a strong kickstart. Once your starter is established, you can transition to feeding it with unbleached all-purpose or bread flour if you prefer. As for water, filtered water is often preferred to tap water, especially if your tap water is heavily chlorinated. Chlorine can inhibit the growth of the beneficial microorganisms you're trying to cultivate. If you only have tap water, simply let it sit out in an open container for a few hours to allow the chlorine to dissipate before using it. Room temperature water is also best, as extreme temperatures can shock the delicate ecosystem.
Finally, a small piece of painter's tape or a rubber band can be incredibly helpful for marking the initial level of your starter after feeding. This allows you to easily monitor its rise and fall, giving you a clear visual cue of its activity. Having these simple tools ready will ensure your sourdough starter creation process is straightforward and enjoyable, leading you closer to baking your first perfect loaf.
The Day-by-Day Journey: How to Make Sourdough Bread Starter
Photo: Silvio Pelegrin / Pexels
Creating a sourdough starter is a journey of patience and observation, typically spanning 5 to 7 days, sometimes longer depending on environmental factors like ambient temperature. Here’s a detailed day-by-day guide to successfully cultivate your own vibrant starter.
**Day 1: The Inauguration**
In a clean 1-quart glass jar, combine 50 grams (approximately 1/4 cup) of whole wheat flour (or rye flour for a more robust start) and 50 grams (approximately 1/4 cup) of lukewarm filtered water. Mix thoroughly with a rubber spatula until there are no dry spots. The consistency should be like a thick batter. Scrape down the sides of the jar, cover loosely with a lid, plastic wrap, or a clean kitchen towel, and place it in a warm spot (ideally 70-78°F or 21-26°C). Mark the initial level with a rubber band or tape. This initial mix awakens dormant yeasts and bacteria.
**Day 2: Initial Observation**
You might not see much activity yet, and that’s perfectly normal. The microorganisms are just beginning to wake up and multiply. Give it a gentle stir. If you see a few small bubbles or notice a slightly yeasty or fermented smell, that's a good sign. Do not feed it today. Simply re-cover and return it to its warm spot. Patience is key.
**Day 3: The First Feed**
Today, you should start seeing more signs of life. You might observe small bubbles throughout the mixture and a slight increase in volume. It might also begin to smell a bit sour, yeasty, or even slightly like nail polish remover – this is typical as different bacteria flourish and die off. Discard about half of your starter (around 50 grams). To the remaining 50 grams, add 50 grams of fresh whole wheat flour and 50 grams of lukewarm filtered water. Mix well, scrape down the sides, mark the new level, and cover loosely.
**Day 4-6: Consistent Feeding and Observation**
Continue the feeding routine from Day 3: discard half, then feed with 50g flour and 50g water. You should notice increasing activity. The starter should consistently develop more bubbles, rise significantly (perhaps doubling in size) after feeding, and then fall back down. The smell should evolve from potentially unpleasant to a more pleasant, tangy, yeasty aroma, sometimes described as fruity or like beer. The rise and fall cycle is crucial – it shows the yeasts are active and consuming the food. If your starter is very active and doubling quickly, you might consider feeding it twice a day (every 12 hours) to keep up with its hunger. This is especially true if you are using a very active flour like rye.
**Day 7 (or when ready): The Mature Starter**
Your starter is considered mature and ready for baking when it consistently doubles in size within 4-8 hours after feeding, has a pleasant tangy aroma, and is full of bubbles. You should be able to see a clear domed top and an airy, web-like structure when you stir it. At this point, your starter is strong enough to leaven bread. Once mature, you can reduce feeding to once a day if keeping it at room temperature, or store it in the refrigerator and feed it once a week. Congratulations, you’ve successfully learned how to maintain your sourdough starter and can now embark on the wonderful world of sourdough baking! Remember, every starter is unique, so adjust your feeding schedule based on its individual activity and your environment.
Troubleshooting Common Sourdough Starter Issues and Tips for Longevity
Photo: Anh Nguyen / Pexels
Even with the best intentions, creating a sourdough starter can present a few challenges. Knowing how to troubleshoot common issues and maintain your starter for longevity is key to a successful and rewarding baking experience.
**Common Issues and Solutions:**
* **No Activity/Slow Activity:** If your starter isn't bubbling or rising after a few days, don't despair. The most common culprits are low ambient temperature or chlorinated water. Try moving your starter to a warmer spot (75-80°F is ideal). If your kitchen is cool, consider placing it in an oven with just the light on (not the heat!), or near a warm appliance. Ensure you're using filtered or dechlorinated water. Also, sometimes simply switching to a whole grain flour (like rye or whole wheat) for a few feedings can give it the boost it needs due to higher nutrient content and more wild yeasts.
* **Unpleasant Odor (like nail polish remover, gym socks, or vomit):** This is often a sign that undesirable bacteria are temporarily dominating, or your starter is very hungry and producing excess acetic acid. Continue with regular feedings, discarding a good portion each time. The beneficial lactic acid bacteria will eventually outcompete the others, leading to a more pleasant, tangy smell. If the smell is truly foul or mold appears, it's best to discard and start fresh.
* **Hooch (dark liquid on top):** Hooch is a liquid byproduct of fermentation, typically alcohol, and it indicates your starter is hungry. A clear or light brown hooch is normal and can simply be stirred back in or poured off before feeding. Darker hooch (brown or black) means your starter is very hungry and has been neglected. Feed it more frequently or increase the flour-to-water ratio slightly to give it more sustenance.
* **Mold:** This is the one true deal-breaker. If you see any fuzzy, colored spots (green, black, pink, orange), your starter has mold and must be discarded. It's not safe to consume. Always ensure your jar and utensils are clean.
**Tips for Longevity:**
* **Consistent Feeding Schedule:** Once active, a starter kept at room temperature needs daily feeding. If you're not baking daily, storing it in the refrigerator slows down fermentation, allowing you to feed it once a week.
* **Proper Storage:** For refrigerated starters, place it in a clean jar with a loose lid after feeding and let it sit at room temperature for an hour or two before refrigerating. This allows the fresh food to kickstart fermentation before the cold slows it down.
* **Reviving from the Fridge:** When you want to bake with a refrigerated starter, take it out 12-24 hours beforehand. Give it 2-3 consecutive feedings (discarding half, feeding with equal parts flour/water) at room temperature until it's consistently doubling in size and very active.
* **Vary Your Flour:** While consistency is good, occasionally feeding your starter a different type of flour (e.g., a bit of rye or whole wheat) can introduce new nutrients and microbial diversity, strengthening its overall health and flavor profile.
* **Listen to Your Starter:** Pay attention to its smell, texture, and how quickly it rises and falls. These are all cues about its health and hunger. A strong, active starter is the foundation for truly exceptional sourdough bread.
Comparison
Feature
Sourdough Starter (Homemade)
Commercial Active Dry Yeast
Commercial Instant Yeast
Flavor Profile
Complex, tangy, unique
Mild, yeasty
Mild, yeasty
Ingredients
Flour, Water
Yeast culture, Emulsifiers
Yeast culture, Emulsifiers
Time to Activate
5-7 days (initial)
5-10 minutes
No activation needed
Storage
Refrigerator (weekly feed)
Cool, dry place (months)
Cool, dry place (months)
Baking Process
Longer fermentation, slow rise
Faster rise, less complexity
Fastest rise, less complexity
Cost
Very low (flour, water)
Low
Low
What Readers Say
★★★★★
"This guide on how to make sourdough bread starter was incredibly detailed and easy to follow. My starter, 'Bubbles,' is now thriving after just 6 days, and I'm so excited to bake my first loaf this weekend. The troubleshooting section was particularly helpful when I had slow activity initially."
Sarah J. · Austin, TX
★★★★★
"I've tried making a starter before and failed, but this article explained everything so clearly. The day-by-day breakdown made it feel less intimidating. My starter smells amazing now and doubles consistently, thanks to these instructions."
Mark T. · Portland, OR
★★★★★
"Following these steps, I successfully created a robust sourdough starter that produced the best loaf of bread I've ever made. The advice on using whole wheat flour for the initial feeds really made a difference in getting it active quickly. Highly recommend!"
Jessica L. · Denver, CO
★★★★★
"The guide is excellent, though my starter took a bit longer than 7 days to get truly active, probably due to my cooler kitchen. However, the consistent feeding and patience, as advised, eventually paid off. It's a great resource for beginners."
David M. · Boston, MA
★★★★★
"As a seasoned baker looking to get into sourdough, this article provided a fantastic refresher and detailed insights into the 'why' behind each step. My starter is now a reliable workhorse, producing amazing bread and even sourdough discard recipes."
Emily R. · San Diego, CA
Frequently Asked Questions
What is the best flour to use when learning how to make sourdough bread starter?
For the initial stages, whole wheat or rye flour is highly recommended. These flours contain more nutrients and a higher concentration of wild yeasts and bacteria, which helps to kickstart fermentation and create a more vigorous starter. Once established, you can maintain it with unbleached all-purpose or bread flour.
My starter smells bad or has hooch; is it ruined?
Not necessarily! An unpleasant smell (like nail polish remover or strong alcohol) or a layer of liquid (hooch) often indicates your starter is hungry or needs to outcompete certain bacteria. Continue feeding it regularly, discarding half before each feed. A clear or light brown hooch is normal and can be stirred in; dark hooch means it's very hungry. Only discard if you see mold.
How often should I feed my sourdough starter?
During the initial creation phase, you'll feed it daily after day 2. Once your starter is mature and kept at room temperature, it typically needs daily feeding. If stored in the refrigerator, it can be fed once a week. Always feed when it shows signs of hunger (less activity, hooch forming).
Is making a sourdough starter expensive?
No, making a sourdough starter is incredibly inexpensive. It only requires flour and water, two common pantry staples. The initial investment is minimal, and with proper care, your starter can last indefinitely, providing a continuous source of leavening for your baking without the need to buy commercial yeast.
How does a homemade sourdough starter compare to commercial yeast?
A homemade sourdough starter provides a complex, tangy flavor and a unique crumb structure due to its diverse microbial community, which commercial yeast cannot replicate. While commercial yeast offers a faster, more predictable rise, sourdough baking involves longer fermentation times that also improve digestibility and nutrient availability in the bread.
Who should try to make sourdough bread starter?
Anyone interested in baking artisan bread at home, those looking for a more natural leavening agent, or individuals who enjoy a hands-on, rewarding culinary project should definitely try. It's perfect for bakers who appreciate complex flavors and the unique texture that only sourdough can provide.
Are there any health risks associated with a sourdough starter?
When properly maintained, a sourdough starter is very safe. The acidic environment created by the lactic acid bacteria inhibits the growth of harmful pathogens. The main risk is mold contamination, which is visually obvious and necessitates discarding the starter. Always ensure good hygiene and use clean containers.
What are the future trends for sourdough starters and baking?
Sourdough baking continues to grow in popularity, with trends focusing on using diverse grain flours (e.g., ancient grains), experimenting with different starter hydration levels for various bread textures, and exploring the unique flavor profiles developed by different starter cultures. There's also a growing interest in understanding the microbial science behind starters for optimized baking and health benefits.
Now that you know how to make sourdough bread starter, you're on the cusp of an incredibly rewarding baking journey. Embrace the process, be patient, and soon you'll be enjoying the unparalleled aroma and taste of homemade sourdough bread. Start your starter today and transform your kitchen into a haven of artisanal baking.

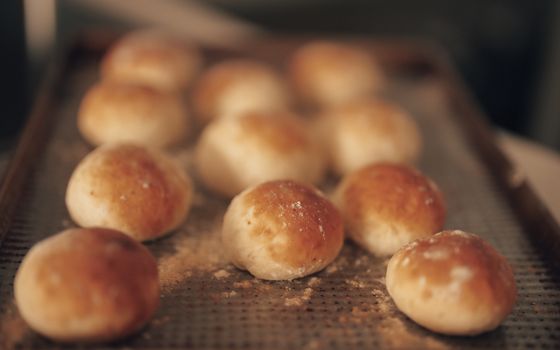 Photo: Guillermo Berlin / Pexels
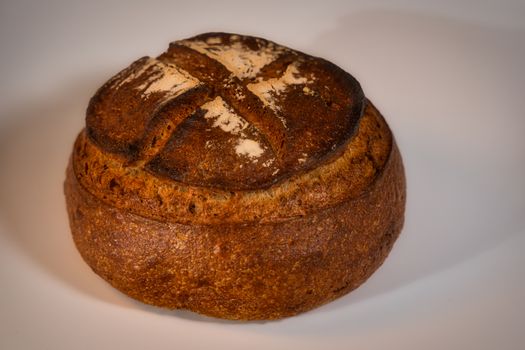 Photo: Travel with Lenses / Pexels
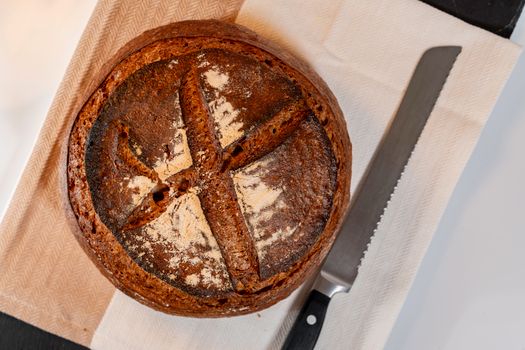 Photo: Silvio Pelegrin / Pexels
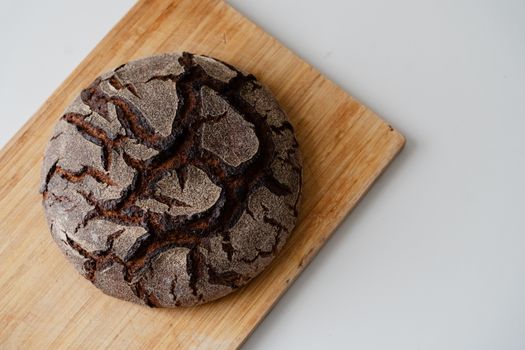 Photo: Anh Nguyen / Pexels